Cheesy Biscuits

cheesy biscuits

cheesy biscuits


Another geek recipe for you. I haven’t posted anything for a while as I have been super preoccupied with other things. My mother was here for a visit a couple weeks ago and reminded me of a family favorite recipe and I thought I would share!

1 can Campbells Cheddar Cheese Soup
1 can good tunafish
1 tube of your favourite biscuits
1 cup milk

Combine soup, milk and tuna in pot over low heat.
Preheat oven according to biscuit directions on label.
Arrange biscuits in pan and spoon small amount of soup mixture over each
biscuit (just enough to cover the top).
Bake biscuits according to directions on label.
Remove biscuits and serve hot with generous amounts of soup mixture
spooned over the top.

** For a bit of added zing, put a little ground black pepper and a few
shots of your favourite hot sauce in the soup mixture while cooking.

Yum!

The New Xoom Review, Comin’ Right At You!

xoom


OK, I am dating myself here but there used to be this show on when I was a kid, called the New Zoo Review, and for some reason the theme song was playing in repeat in my head while I was thinking about writing this review. That’s how the title comes about, and it’s been a wickedly long week, so that’s about as clever as I can muster right now.

I bought the Motorola Xoom wifi only tablet the day it came out because I have been wanting / looking for / dreaming of a device that *could* be android powered that would be a respectable netbook replacement for me. I wanted something with at least a 10 inch display, fast processor speed, decent storage and memory and significantly thinner and lighter than my netbook that I could use as a daily carry. What goes without saying, there, is that there needs to be functionality with all that I do.

Unfortunately, with the Xoom, this was not to be…

The Xoom is a very appealing looking device which appears to meet many of my basic needs quite well. It is thin and light. It has a beautiful and very functional touch display. The battery lasts quite long at around 2 days of use. It’s only everything after that that is a disappointment.

Let’s start with the price. This was $600 + tax for the wifi only version. I believe this to be a bit excessive, even if the device actually *did* deliver. That being said, I did, and would pay it again to the company that does it right, but there are a lot of disappointments with this tablet:

This tablet does not act as a usb mass storage device. You heard it right. When you jack this into your computer, you have to fumble around and try to find a utility program and/or drivers that do Media Transfer Protocol. I DO NOT understand why they would do this unless they are intentionally trying to irritate their customers. My Moto Droid (the original) could connect as usb mass storage, why can’t this??

This tablet will not charge via the usb cable. Again, what were they thinking. You have to use a needle thin charger plug that has every appearance of wanting to snap off at the slightest bump. Once I finally got the majority of my power and data needs consigned to a single USB cable, Xoom makes sure you have to carry another proprietary wall-wort.

Honeycomb is NOT ready for general use / release. As pretty as it is, the new android OS has lots of bugs. I cannot tell you how many times apps like facebook, gmail, email and the browser crashed on me in the week I used this tablet. The apps are beautiful when they work, but also lack important functionality. For instance, the email app doesn’t do filters. Also, I was particularly thrown back when I could not get my pandora app to run at all!! Ack!

I think the straw that breaks the camel’s back for me is lack of a cisco vpn client. Granted, this is not really the Xoom’s fault, but I need to be able to do some real work with my tablet and this is a HUGE hindrance for me. This one thing means I have to carry a netbook with me anyhow which was the point of getting a tablet in the first place.

Bottom line is if you are looking for some cool tech and do NOT neet to do work with it and / or can wait until they fix a bunch of things AND you have a spare $600 to shell out for said broken product, then run to your nearest store and buy one of these. If you are like me and need a small, slim, lightweight. functional tablet with more stable software and a decent vpn client to replace your netbook, then wait ’till the iPad 2’s are back in stock. Sorry android and Motorola, you lose on this one.

Linux Shell Scripting Cookbook

Linux Shell Scripting Cookbook

Linux Shell Scripting Cookbook


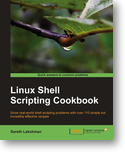
   As a full time Senior Linux System Administrator in real life I was quite interested to get my fingers on this book for a review. After all, the job of a smart sysadmin pretty much dictates scripting away as much of your work as possible. We are a lazy bunch and we call that being efficient 🙂

   This is the first book I have reviewed by Packt Publishing or the author, Sarath Lackshman, I wasn’t really sure what I was in for. In fact I was slightly put off by the price, which I initially thought overly hefty at $45 US. For that kind of scratch I am used to seeing a much more substantial sized book from the sort of publishers I normally review for. I started making my way through the book anyway, and I am glad I did.

   What makes this book really cool is the premise behind it. Inside, as a “cookbook” should, you have these “recipes” for scripts. These are not what I have normally seen in many scripting books before, which are generally theoretical and sometimes lengthy examples, but these recipes are pretty straight forward, real world examples of things you might want to do, and how to handle those efficiently. The recipes are also small enough that you could easily piece meal things out to compose another script and I am certain that would be a great help to novice scripters.

   As nice as I think this book would be for novice scripters, there is a lot of smart stuff in there, stuff that had never occurred to me through my years of command line use. I actually got really excited to try some of the examples in there and to put them into practice. I particularly liked the little tricks here and there, like the “subshell trick” and I was absolutely thrilled that this book used modern syntax and variable manipulation, dropping the deprecated stuff like putting commands into back ticks. Good form!

   This book is certainly a keeper and I would recommend it highly to anyone who wants to become proficient on the command line. Some days you actually *do* get what you pay for, and I believe people will find this book to be a good example of that. This book was truly fun for me to work my way through and I sure hope they have more like it in store for the future. Go buy yourself a copy. I know I will be hanging on to this one for a while 🙂

RHEL 5 quick and dirty samba primer

samba

samba


A friend asked me for a quick primer on how to set up a windows accessible share under RHEL 5, so I thought I would include it here for the benefit of anyone interested.

  • sudo yum -y install samba
  • sudo vim /etc/samba/smb.conf
  • replace the file with something like so:

[global]
workgroup = SOMEWORKGROUPNAME
server string = SERVERHOSTNAME Samba Server Version %v
security = user
netbios name = CALLMESOMETHING
[data]
comment = my data share
path = /data
read only = no
writable = yes
guest ok = no
available = yes
valid users = USERNAME

  • add a local user to the box: sudo useradd USERNAME
  • add the local user to samba and give password: sudo smbpaswd -a USERNAME
  • restart samba service: sudo service smb restart
  • make sure samba starts at boot: sudo chkconfig smb on
  • adjust your firewall settings if necessary

At this point you should be able to access the share at //servername/data.
Have fun!

System Administration: Information

Probably 50% of a SysAdmin’s job revolves around information. Knowing what is going on with your systems can make all the difference. Just don’t make the mistake of thinking that the more information the better. What you really need is the *correct* information at the appropriate time and it shouldn’t be obfuscated by extra information.

Good info sources:
Use OSSEC and Nagios. These products will notify you about security issues and outages.

There is a child’s fable about the boy who cried wolf. To make a long story short, the boy made false alarms several times drawing attention until when he really saw a wolf, nobody would come. There is an important lesson in there about information too. After a while, if you are flooded with info you don’t need, you tend to stop paying attention and may miss something important.

The right stuff:
Make sure that you set up your source filters or rules well. Use your mail filters wisely and set them up as you go along to remove non essential notifications. And most importantly, read and pay attention to those alerts and notifications you get!

An oldie but goodie

I am moving some old backups from a suspect broken NAS to a new one (before all my power goes out from an impending storm) and ran across my backups from my original blog. Interesting side note is that I started blogging on September 17th 2003. Anyhow, while looking at that I found what is probably the first actual picture of the original TechShow team. I now present to you in all it’s glory, Linc, Dann and Allan and the original TechShow set from 2003:

Original TechShow

Original TechShow

Stay Tuned!

Linux Shell Scripting Cookbook

Linux Shell Scripting Cookbook

I have been asked to review the “Linux Shell Scripting Cookbook” by Packt Publishing. It’s supposed to be coming in a couple days, so here’s your teaser to stay tuned! Packt Pub vs. Curmudgeonly SyaAdmin, a dead tree death match, only here at lincgeek.org/blog.

So you want to be a Linux admin…

This is somewhat of a reprisal of some thoughts I shared on a recent episode of the LinuxLink TechShow.

I have been asked many times about being a Linux admin. After a few years of walking the walk and being in on a lot of interviews, I have compiled a few mental notes and thought I would share…

  • Get a cert.
    I have been doing Linux for a LONG time but I never had so many job offers until I got my RedHat cert and put it on LinkedIn. Once that happened I get, some weeks, upwards of 5 job offers per week. Seriously. These offers are also local – not like people are calling me to move out of state or even out of the area. The jobs are out there folks. Linux people are currently on the hot list. Just do it right and you should be a shoe in.
  • Know your stuff.
    Here’s the deal. You MIGHT run into a company where you can snow them into thinking you are a serious Linux guy even though you don’t know how to tell what directory you are in on the command line, but it sure won’t be MY company. I ask potential candidates lots of questions – ones that I am convinced that anyone that *actually uses Linux* should know. Make sure that you do. You should know all kinds of common Linux things down absolutely cold and this includes things like common userland commands, problem diagnosis and resolutions. If you don’t know the fix to a problem, you should be able and prepared to demonstrate that you can quickly find the correct answer / resolution.
  • Don’t rely on the gui.
    I used to think this was a given but after a dozen interviews it bears mentioning. You *cannot* correctly administer a hundred servers if you need to rely on gui tools. They may be handy in a pinch, but they are wildly inefficient. On the same tolkin, you should be familiar and comfortable with at least basic scripting. One of the questions I generally ask is if another administrator left your company, how would you change the root password on 100 servers in a hurry?
  • Do be familiar with Desktop Linux.
    Although I think it’s extremely important to be command line savvy on the server end of things, I am also convinced that a Linux guy should be comfortable with using it on the desktop as well. It always strikes me as strange when I ask a Linux guy what kinds of computers he has at home and what he uses them for and he (or she – it’s just a figure of speech) says they have a windows laptop that they only use for browsing the web and email.
  • At least feign interest.
    In my opinion, a Linux system administrator should be interested in Linux and system administration. Things like playing at home with different linux distributions, running your own home server, setting up , learning about and trying different Linux services are all big plusses.
  • Don’t BS on your resume (or resume inflation).
    A friend of mine I work with and I have this theory that a person’s actual skill level with Linux is conversely proportionate to the size of their resume. Actually, this goes back to that “Know your stuff” rule as well. Put the relevant things you know on your resume and *actually know them*. Trust me, I will ask you technical questions about the things you list on your resume and I *will* find out if you are lying. Inflated resumes may impress H.R. people but not the people who actually have to weed through them.
  • Shake hands like you mean it.
    When you come for an interview, if you offer to shake hands or take an offer to shake a hand, actually do it. Nothing weirds me out more than someone giving me one of those limp wristed, pantywaist, palm tickle handshakes. Grip my hand like you mean it and give it a good shake like you are happy to be there.
  • Be genuine.
    Don’t try and be someone you are not during the interview. Be yourself, relax a little, be honest. Don’t be overly cocky, snarky, apologetic or overtly eager. Also, try and dress decently and speak well. 🙂

That’s all I can think of right now – Knock ’em dead!

Server Build

Last night on the TechShow I was asked about providing some info on a decent default server build. Here are some quick notes to get people going. Adjust as necessary.

Just for ease, here, lets assume you are installing CentOS 5, a nice robust enterprise class Linux for your server needs.

CentOS 5 / RHEL 5 / Scientific Linux, etc., does a really great job picking the defaults, so sticking with those is just fine and has worked well for me on literally hundreds of servers.

  • I let the partitioner remove all existing partitions and chose the default layout without modification.
  • Configure your networking appropriately, make sure to set your system clock for the appropriate timezone (no I do not generally leave my hardware clock set to UTC).
  • When picking general server packages I go for web server and software devel. I do not, generally, pick virtualization unless there is a specific reason to. I find that the web and devel meta server choices provide a robust background with all the tools I need to set up almost any kind of server I want without having to dredge for hundreds of packages later on.
  • The install itself at this point should take you about 15 minutes depending on the speed of your hardware.
  • Once installed, reboot the server and you should come to a setup agent prompt. Select the firewall configuration. Disable the firewall and SELinux completely (trust me here). Once that is done, exit the setup agent (no need to change anything else here), login to the machine as root and reboot it. This is necessary to completely disable SELinux.

From this point on it’s all post install config…:

  • Add any software repositories you need to.
    I not only have my own repo for custom applications, but also have a local RedHat repo for faster updates and lower network strain/congestion.
  • Install your firewall.
    I use an ingress and egress firewall built on iptables. While mine is a custom written app, there are several iptables firewall generator apps out there you can try.
  • Install your backup software.
    Doesn’t matter if this is a big company backup software like TSM or CommVault, or you are just using tar in a script. Make sure your system is not only being backed up regularly, but that you can actually restore data from those backups if you need to.
  • Add your local admin account(s).
    Don’t be an idiot and log into your server all the time as root. Make a local account and give yourself sudo access (and use it).
  • Fix your mail forwarding.
    Create a .forward file in your root directory and put your email address in there. You will get your servers root emails delivered to you so you can watch the logwatch reports and any cron results and errors. This is important sysadmin stuff to look at when it hits your inbox.
  • Stop unnecessary services.
    Yes, if you are running a server you can probably safely stop the bluetooth and cups services. Check through what you are running with a “service –status-all” or a “chkconfig –list” (according to your runlevel) and turn off / stop those services you are not and will not be using. This will go a long way toward securing your server as well.
  • Install OSSEC and configure it to email you alerts.
  • No root ssh.
    Change your /etc/ssh/sshd_config and set “PermitRootLogin no”. Remember, you just added an admin account for yourself, you don’t need to ssh into this thing as root anymore. Restart your sshd service after making the change in order to apply it.
  • Set runlevel 3 as default.
    You do not need to have a GUI desktop running on your server. Run the gui on your workstation and save your server resources for serving stuff. Make the change in /etc/inittab “id:3:initdefault:”.
  • Fix your syslog.
    You really should consider having a separate syslog server. They are easy to set up (hey, Splunk is FREE up to so much usage) and it makes keeping track of whats happening on multiple servers much easier (try that Splunk stuff – you’ll like it).
  • Set up NTPD.
    Your server needs to know what time it is. ‘Nuff said.
  • Install ClamAV.
    Hey, it’s free and it works. If you do ANYTHING at all with handling emails or fileshares for windows folks on this machine, you owe it to yourself and your users to run Clam on there to help keep them safer.
  • Do all your updates now.
    Before you go letting the world in on your new server, make sure to run all the available updates. No sense starting a new server instance with out of date and potentially dangerous software.
  • Lastly, update your logbook.
    You should have SOME mechanism for keeping track of server changes, whether it be on paper or in a wiki or whathaveyou. Use it RELIGIOUSLY. You will be glad someday you did.

ESXi and Subsonic

In continuation, somewhat, of my last post and a brief review on the last TechShow, I wanted to jot down some notes about my newest encounter with ESXi and Subsonic.

Subsonic

Subsonic

I wanted to try out Subsonic, so I really needed to put together a new machine to play with it a bit. As a RL System administrator, some things carry over into my home computing environment, and paranoia is one of them. I just *have* to test things outside of my “production” servers at home too. Since I run my servers in a virtualized environment, this shouldn’t be too much of a problem.

I run ESXi at home for my virtualization platform, and the norm there is to use virtualcenter (or the vic) to create and manipulate VMs. The problem there is I am just not a Windows fan (no kidding). I had gotten around this problem initially by creating a VM on VMware Server (running on Linux) and then using VMware Converter to move that VM to my ESXi machine. This time, I did a little more digging on the subject of using the command line to create those VMs natively and I actually found some great information that let me do just that. What I found was these two links that contain all the information I needed:
ESXi – creating new virtual machines (servers) from the command line
and
http://www.vm-help.com/esx40i/manage_without_VI_client_1.php

Without rehashing a lot of the detail provided in those two sites, the basics are using vmkfstools to create a disk image for you to use and then building a small minimal vmx file with enough info in it to get things going. To do the install, make sure have your vmx start an iso image from the cdrom drive and turn on vnc for the box. From there it’s quite easy to get an install working.

The server I decided upon installing is CentOS 5.5. I chose the standard server install and the only things that were required to get Subsonic working on it were:
yum install java-1.6.0-openjdk
and then to download and install the rpm from Subsonic’s website. A little later on I found that Subsonic would not stream my ogg files and that was easily fixed by:
rpm –import http://apt.sw.be/RPM-GPG-KEY.dag.txt
wget http://packages.sw.be/rpmforge-release/rpmforge-release-0.5.2-2.el5.rf.i386.rpm
rpm -Uvh rpmforge-release-0.5.2-2.el5.rf.i386.rpm
yum install lame ffmpeg

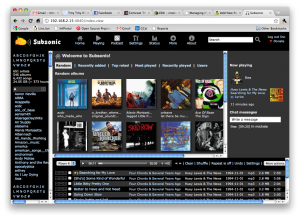
After all that, pointing your web browser to http://:4040 and you are rocking and rolling with the big boys. The thing that really impressed me with the setup is when you tell Subsonic where your music is. On every other music server install this is the part where it takes a while to scan and index your music. With Subsonic this was surprisingly almost instantaneous! You tell it where the music is and *whamo* your music shows up, ready to be played. Fantastic! The other great piece is the ability to add album art. You can just tell subsonic to change your album art and it finds some suggestions on the web and will let you pick the correct one and save it to your collection. It’s very nice and a complete time grabber 🙂